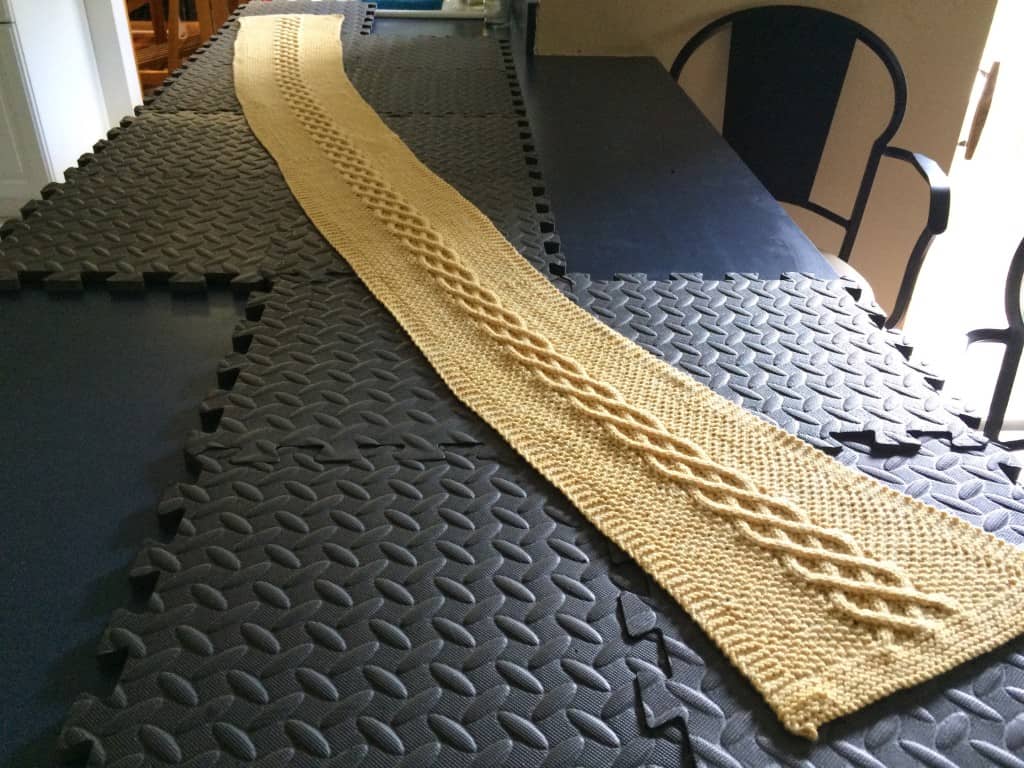
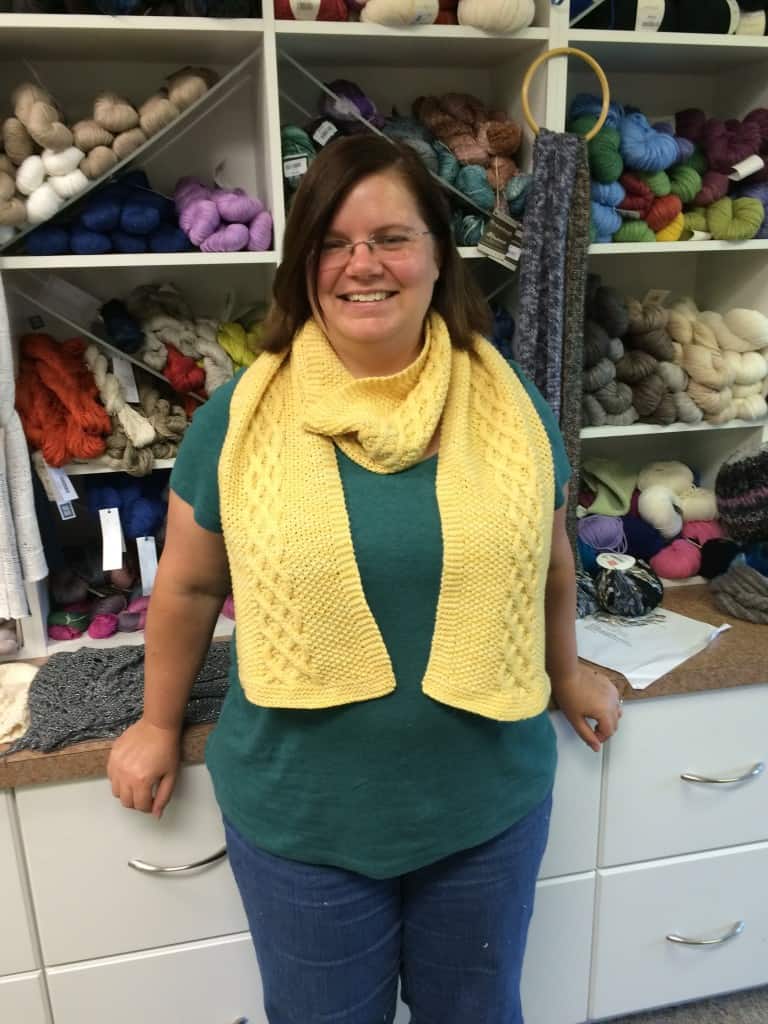
As promised in yesterday’s WIP Wednesday post, here’s the info on the Sand Tracks Scarf that I finished earlier this week.
Official Stats
- Date Started: June 3, 2015
- Date Finished: June 15, 2015
- Pattern: Sand Tracks Scarf by Tracey Lee
- Yarn: 500 yards Swans Island Natural Colors Worsted in Maize
- Needles: US 7 / 4.5 mm
- Finished Dimensions: 7.75″ x 73″
- Made for: ?
- Ravelry Project Page
About This Project
In early June, I signed up for two test knits, including this pattern. These are the first patterns I’ve ever test knit. I wanted to know more about the process of creating a pattern, and thought this would be a fun way to learn a little more about that. I really enjoyed both of the projects, and the test knitting process. I’ve signed up for another test knit and am swatching for it now.
This particular pattern was an interesting challenge. I’m not a huge fan of seed stitch. I knit English style (throw the yarn with my right hand). When I have to switch between knit and purl a lot — and with seed stitch you are switching on every new stitch — it slows me down since I have to reposition the yarn.
Cables slow me down too. I don’t use a cable needle anymore. Instead, I pinch the base of the stitches that form the cable, slide them all off the needle, put them back on the left hand needle in the correct order, then work the stitches according to the cable directions. This is obviously slower than working across the row, but it is quicker than using a cable needle.
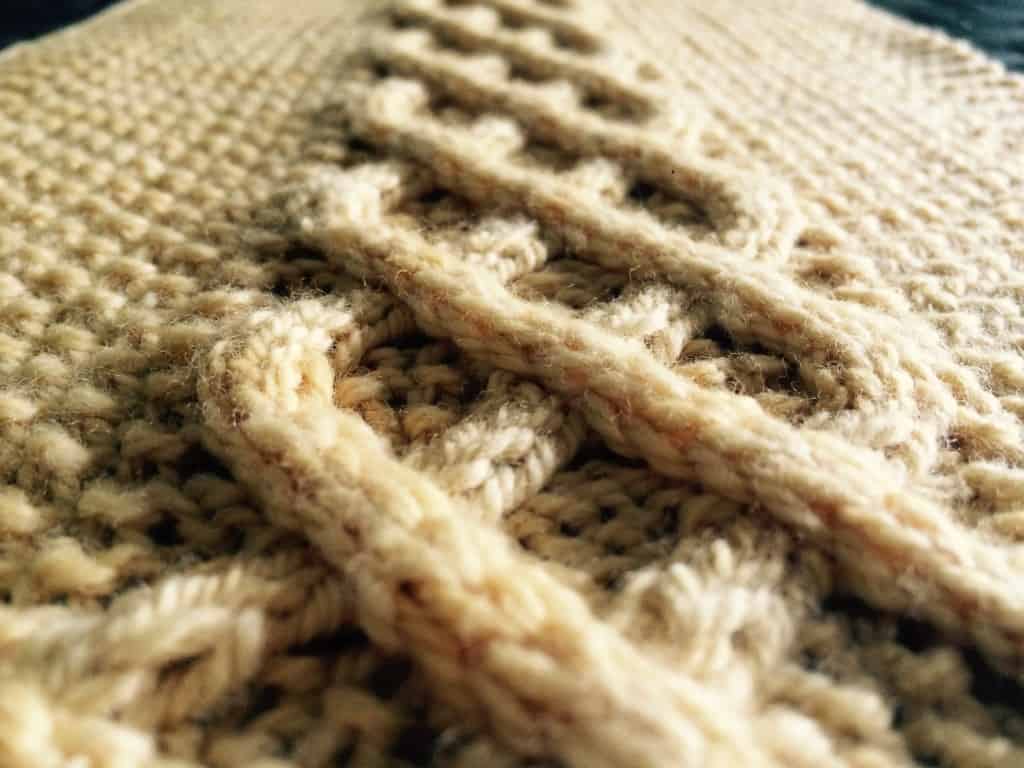
In this scarf, the cable is asymmetrical. In addition, it is partly worked on a seed stitch ground not reverse stockinette, like most cables. If you look closely at the inner part of the cables in the picture below, you might be able to see that the central diamond shape has the traditional reverse stockinette, but the outer diamonds are seed stitch.
In order to form these varying grounds, the pattern uses 5 different cable stitches. Some are 4 stitch cables and some are 3 stitch cables. Some of the cable stitches involve purling in the cable. The complexity of the cables and the combination of cables and seed stitch make this project intermediate difficulty.
The pattern provides both written and charted directions. While I always use the charts in lace patterns, I always use the written directions for cables. There’s nothing wrong with the charts in this pattern. I did compare the written and charted directions to see if they matched and they did. It’s just that I find the chart symbols for cables confusing. I have to focus on them carefully to distinguish the number of stitches involved and which stitches are held to the front. I find the written short hand for cables easier to look at and understand. Since this particular pattern does have so many different cable stitches in it, I highlighted each one in a different color, both in the abbreviation section at the beginning of the pattern and in the written instructions. By the time I was 1/3 of the way through the scarf, I could knit without referring back to the abbreviations.
I hope I’m not making this pattern sound so hard that you don’t want to try it, because it was really fun and interesting to knit. The pattern is a 10 row repeat and, despite the combined challenge of seed stitch and advanced cables, it only took me about 1/2 an hour to knit through one repeat. The entire scarf consists of 42 repeats and took 23-25 hours (including the borders, cast on, bind off, blocking) to create.
This is the first time I’ve used the Swans Island yarn. This yarn is custom spun in New England, in one of the four mills in the United States to earn a Global Organic Textile Standards Certification. It is hand-dyed using natural dye processes. It is super soft organic merino and an absolute dream to knit. The yarn is tightly plied and did not split at all. This particular color was such a good match for this scarf; the softly tonal yellows really make the scarf look like tracks in the sand, as the name of the pattern suggests. I used every inch of two skeins of yarn. I just knit the repeat until I was running out of yarn, then did the border. I underestimated how much yarn I needed for the border, so on my first try I had to rip out 5 rows of border and 6 rows of the last pattern repeat, then redo the border. The second time, I had the perfect yardage to finish the border, bind off, and weave in the end.
I truly loved every minute of knitting this scarf. The pattern was well-written (I didn’t find any errors at all, not even a typo) and the yarn was spectacular. When I bound off, I was ready to cast on for another one. That’s not something I usually say when I finish a scarf!


